 I was waiting for the perfect occasion to finally take a crack at making cake bites because I have been obsessing over these babies for a very long time. My friend Veni’s birthday was most definitely the perfect occasion. I was originally planning on making panda cake pops, but decided that was too ambitious for a first timer. These are perfect for beginners. Getting the actual cake balls to be a similar size proved to be a bit of a challenge, but everything else was a piece of cake. ;) This, of course, was taken from the Cake Pops by Bakerella book. I played with the colors a little bit and didn’t use chocolate like the recipe originally calls for.
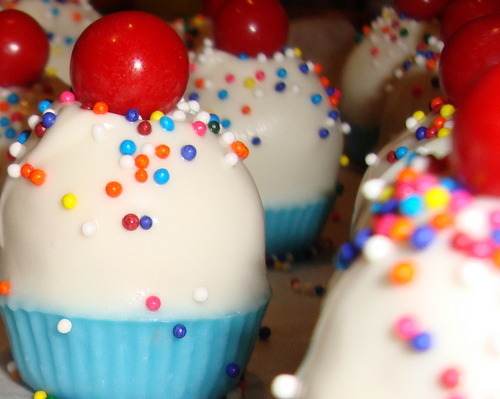
Ingredients and Supplies:
- 18.25-ounce box cake mix
- 9-by-13-inch cake pan
- large mixing bowl
- wax paper
- 2 baking sheets
- plastic wrap
- 48 ounces (3 pounds) chocolate candy coating (I used vanilla candy melts in blue)
- 2 deep, microwave-safe bowls
- large plastic squeeze bottle
- medium-sized plastic candy cup mold (w/cavity opening 1 1/2 inches wide)
- 24 ounces candy coating in color of your choice (I used white)
- toothpicks
- m&m’s or similarly shaped candy (I used gumballs)
- sprinkles
Directions:
1 - Bake the cake as directed on the box, using 9-by-13-inch cake pan. Let cool completely.
2 - Once the cake is cooled, get organized and set aside plenty of time to crumble, roll, dip, and decorate 4 dozen cake bites. (The book says a couple of hours, but it only took me an hour to make 3 dozen.)
3 - Crumble the cooled cake into a large bowl. You should not see any large pieces of cake.
4 - Add three-quarters of the container of frosting. (You will not need the remaining frosting.) Mix it into the crumbled cake, using the back of a large metal spoon, until thoroughly combined. If you use the entire container, the cake balls will be too moist.
5 - The mixture should be moist enough to roll in to 1 1/2 inch balls and still hold a round shape. (I used a small cookie scoop.) After rolling the cake balls by hand, place on a wax paper-covered baking sheet.
6 - Cover with plastic wrap and chill for several hours in the refrigerator, or place in the freezer for about 15 minutes. you want the balls to be firm but not forzen.
7 - Place the chocolate candy coating (or whatever color/flavor you chose) in a deep, microwave-safe plastic bowl. (I suggest doing 3 or 4 smaller batches instead of all 3 pounds at one time. You’ll have to heat it for a long time and there’s a chance that it could burn.) Melt the coating, following the instructions on the package.
8 - Once melted, transfer the coating to a large plastic squeeze bottle.
9 - Use the squeeze bottle to fill one cavity of the candy mold about halfway full with coating and immediately place a rolled cake ball into the coating. The cake ball should be slightly smaller than the width of the candy mold. Slowly push the cake ball down until the pressure causes the candy coating to force its way up the mold and fill in around the sides of the cake ball. You may have to experiment with a couple to get the right amount of coating. Stop pushing once the coating reaches the top edge of the candy mold, so that it doesn’t form a lip around the edge. Repeat for the remaining cavities. (To save time, use multiple cake molds.)
10 - Set the filled candy mold(s) tray on the second baking sheet to keep it from bending, and place in the freezer for just a few minutes to let the candy coating set.
11 - Remove the tray from the freezer and separate the half-coated cupcake bites from the candy mold. Give the mold a twist and pull on the exposed cake ball.
12 - Melt the second color/flavor of candy coating in a microwave-safe bowl to be used for the cupcake bite tops.
13 - Holding the bottom of the cupcake bite, dip the tip in the melted candy coating until it meets the edge of the other candy coating. When removed, if the two coatings don’t meet, you can turn it right side up and use a toothpick to touch up any uncoated areas.
14 - Immediately decorate with 1 m&m (or whatever candy you are using) and some sprinkles. Allow to dry completely on wax paper-covered cookie sheet. Repeat with remaining cookie bites.
15 - Store in airtight container for several days.
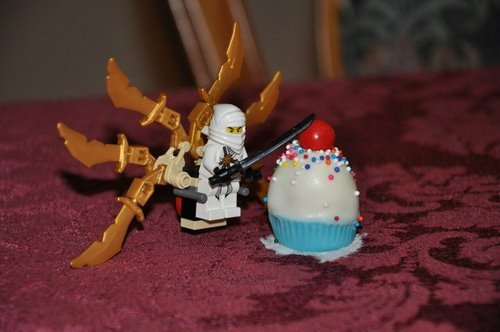
Here’s a funny picture my friend took of the cake bites I gave her and the present my boyfriend and I gave her husband for his birthday:
No comments:
Post a Comment